Building LEGO Mechs – The Basics

(Written by ninja5) One of my favorite things to build out of LEGO bricks is mecha, or mechs. Mechs are very popular with LEGO builders, and there are many official LEGO sets with mechs as well. In case you aren’t familiar with what a mech is, it’s basically a big robot with a cockpit that can hold a person (or in this case, minifigure) to navigate it. Mecha come in many shapes and sizes; I’ve seen four-foot tall mecha at BrickCon (LEGO convention in Seattle), and also tiny ones that are basically the size of a minifigure. Mecha can look like giant armored humans, animals, armored tanks on legs with Gatling arms, or any other shape you desire. Below I’ll show you some basic steps for building a mech in case you want to build your own. So let’s begin! 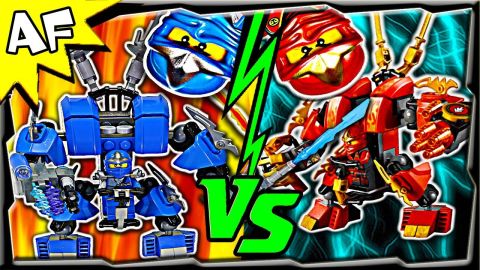 To build a LEGO mecha, it is best to start with the legs as they will provide the foundation and support. They have to be sturdy enough to hold up your entire model, and also have articulation for movement. Keep in mind that the legs can have knees that bend forward like human knees, or they can bend backwards (these are usually referred to as “chicken-walkers”). Or you can just skip the knees all-together, like I did with the mech below.
 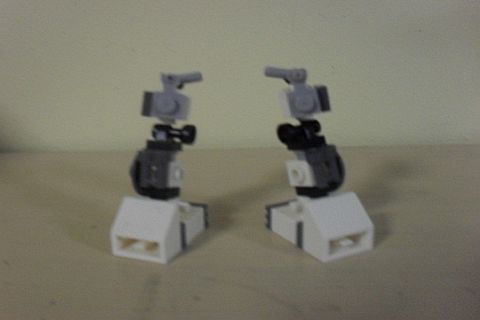 Next, you need to build a torso for your LEGO mech. The torso needs to be about the same height as the legs to be proportional, and it also needs to be pretty sturdy. You can design the torso so that the cockpit is on it, inside it, or at the top in the “head” section. Also, don’t forget to include attachment points for the arms!
 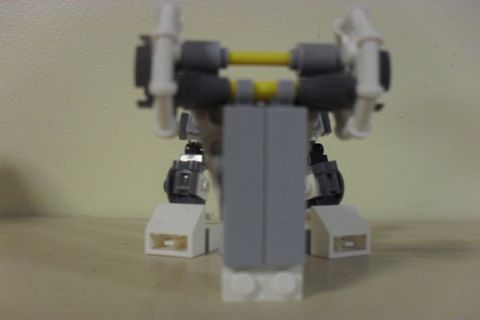 The next step is to attach the main body or torso of your LEGO mech to the legs. Then you can start working on the arms.
 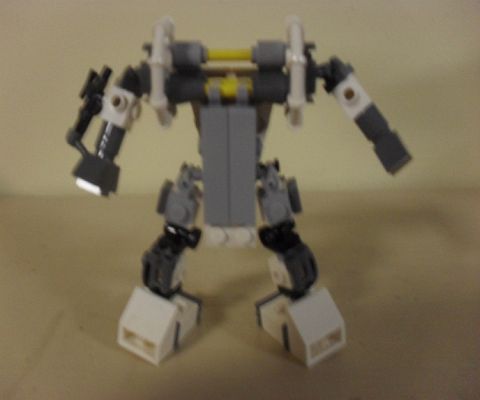 So now you have the basic shape of a LEGO mech, but it’s still missing three very important features: weapons, armor, and a pilot. Therefore the next step is to add the cockpit and pilot, and some weapons, tools and other accessories. You can attach them at the ends of the arms, on the shoulders, on the legs, and pretty much anywhere else you feel like they should go.
 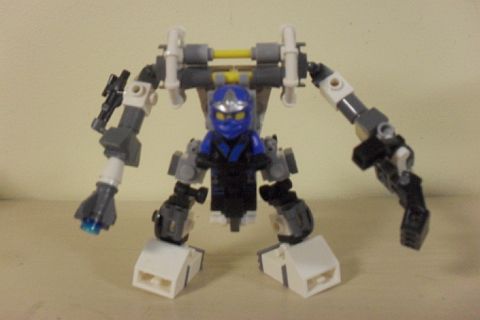 The final step is to attach armor to protect the mech and the pilot. It should match the color-scheme of your mech that you have established so far. The best places to put armor are on the arms, the legs, the body, and around the cockpit. This will also bulk up your mech to give it a stronger look.
  Congratulations! If you followed these steps you now have completed your very own LEGO mech! At this point you can leave it as it is, or you can continue refining your design by adding extras like antennas, booster-rockets, stickers and more!
  LEGO mecha are not terribly hard to build (unless you are building a 4-foot tall one) and they are lots of fun. They also have great play value, especially if you build a whole army of them for big battles and smashing stuff. If you would like to get some inspiration I would recommend you visit Mark Stafford’s gallery on flickr. Mark is an official LEGO designer, well known for his amazing LEGO mechs (see picture above). One of my favorite styles of LEGO mecha are what I call “Ninjago mecha”. These are based on the #70500 LEGO Ninjago Kai’s Fire Mech set, a really nice little mech that requires few elements and is fun to build. One expert at building this type of LEGO mecha is ArtifexCreation (see videos below); they have created LEGO mecha for all four ninja, Sensei Wu, a snake warrior, a stone warrior, General Kozu, a skeleton warrior, Nya, and Lord Garmadon. Not all of their mecha are built in the previously mentioned style, but most of them are. As I have mentioned, there are also official LEGO sets with mechs. I own a few of them myself, including the LEGO Power Miners mech from 2009 (set #8189), the #31007 LEGO Creator Power Mech (technically not a mech but a robot, but it does come with great parts and building techniques), and the above mentioned LEGO Ninjago Kai’s Fire Mech. My current favorite set that comes with a mech is the #70814 LEGO Movie Emmet’s Construct-o-Mech that will be officially released in just a few days.
 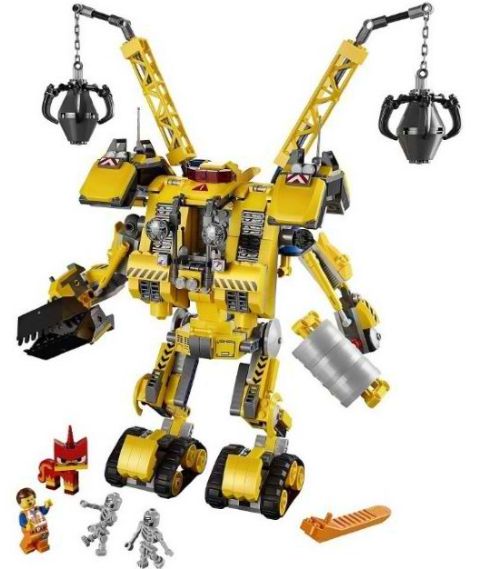 I hope this article gives you some ideas for LEGO mech building. If you have questions of comments feel free to share in the comment section below. Also, I’m a KFOL (Kid-Fan-of-LEGO), and this is my third post here at theBrickBlogger. Feedback is welcome!
 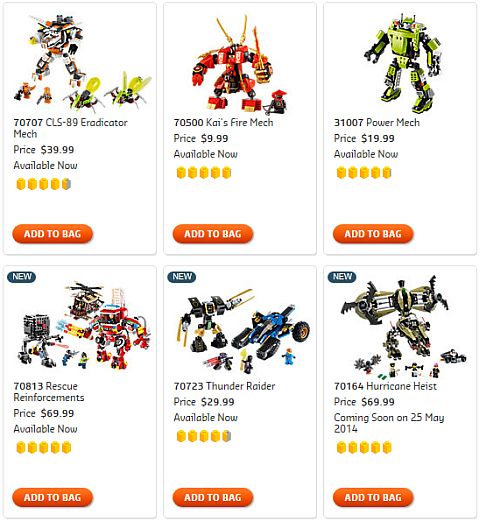 And you might also like check out the following related posts:
- The LEGO Movie Fire-Mech Alternate Model
- LEGO Galaxy Squad Eradicator Mech Review
- LEGO Ninjago Samurai Mech Review
Share this post:
BLProductions May 27, 2014, 10:26 AM
Nice post, ninja5! 😀 I love mechs, particularly Ninjago Mechs. I have Kai’s Fire Mech, and my brothers have the Thunder Raider, but those seem to be our only mechs. 🙁
I must note though that if you watched JANGBRiCKS review of Emmet’s Mech, you can see that it doesn’t have a lot of flexibility, so though it looks cool (it is), it is actually not a great mech. 😕
Also, ninja5, if those are your pictures, your camera is out of focus. I think it may have been too close to the subject. Try moving the camera away and zooming in, it helps. 😉
admin May 27, 2014, 10:59 AM
Yeah, that was interesting about Emmet’s mech; that the legs didn’t move much. My guess is that this has to do with the sheer size of the mech. I think little kids would get very frustrated if their mech keeps falling over. I have the fire-truck mech and it has that problem; it has more flexibility, but it keeps falling over unless you position it just right because the upper body is so large and heavy.
BLProductions May 27, 2014, 11:35 AM
Yeah, I my youngest brother has called both of those sets, I’ll let him get them and see how frustrated he gets. 😕 🙂 There is a review on Brickset today on Emmet’s Mech, it shows more of that problem.
Strider May 27, 2014, 8:18 PM
I saw the video review by Artifex Creation, and at the end it showed that it could be pushed back some without falling over. So at least it is very sturdy.
ninja5 May 27, 2014, 12:26 PM
I realized after I watched the video that it is pretty easy to customize it to be more flexible. Also, I wrote this several days before that video came out.
